If the tile surfaces in your home or office are looking tired, it’s amazing the difference regrouting existing tiles can make. Often the tiles themselves remain new looking and untarnished, but the grout that fills the spaces between can over time become worn and discoloured. The effects are most noticeable where the grout is white or a light colour.
How To Change The Colour of Your Grout
For this job, you only need simple hand tools, but you will need to put some time and effort in to achieve a good result. In this example I have removed the existing grout carefully with a utility knife. This requires you to follow basic safety while using the knife and wear suitable hand and eye protection.
The grout is softer than the tiles, so the blade will naturally stay within the grout line. Take care at the corners of tiles so as not to chip them. If you are changing grout colours, you need to be more conscientious over the removal of the existing grout, to avoid spoiling the new grout’s appearance.
Using a vacuum cleaner will help you remove the old grout from the lines and keep dust and mess to a minimum.
When you have finished the area, thoroughly clean the tiles with a damp sponge and suitable cleaner. Wipe the floor one last time with only water to remove any cleaner residue.
Is It Really That Easy To Change The Colour of Your Grout?
Yes, it is – just start by mixing the grout and apply according to the maker’s instructions. Depending on the grout chosen, you will find it easiest to work in a systematic way, applying grout, then cleaning up the area before moving on. If you are regrouting a floor, make sure you work smart and start grouting at a point furthest to your exit from the room. Once dry, buff the tiles up with a damp cloth. It may be worth applying a grout sealer at this point to give your new grouted tiles the longest life possible.
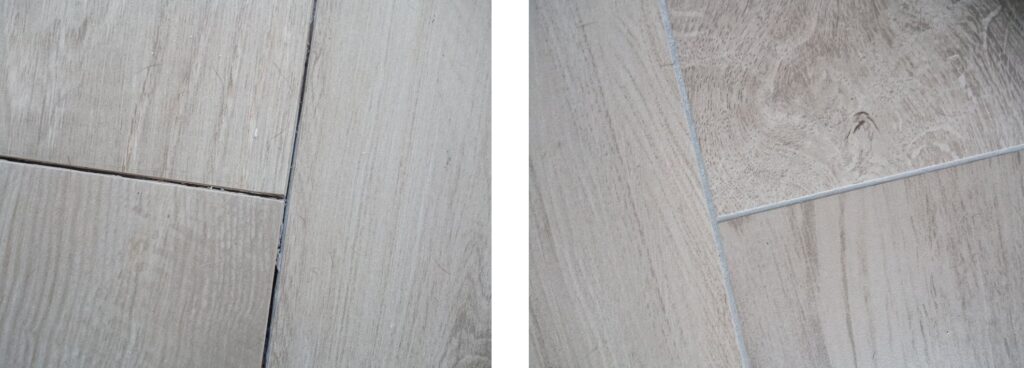
See how much difference can make!
Let us know if you’ve ever changed the colour of your grout – how was it?
Leave a Reply